CG Crystal - Tutorial
Hey guys ! A lot of people have asked me how I created the crystal parts in my Amethyst project. So here it is !

1. Object creation
In 3ds Max, I created the different looking stones with a tool called Debris Maker 2.0 by Aaron Dabelow. You can download it here.

2. Generating objects on a surface
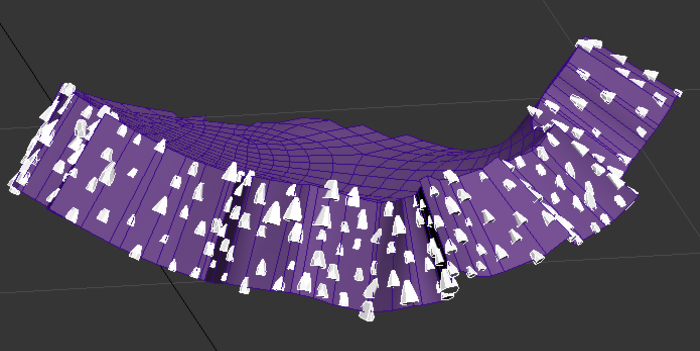
I then separated the surface I wanted the crystal to be on into different objects. I this case there are the center parts which are the bigger stones (dark purple), the sides which are small stones (white), and medium stones in between (light purple).

I used Pflow to generate the stones on the surface.
- I first created a Standard flow
- Made sure particules were displayed as geometry
- Replaced Position Icon by Position Object. Checked 'Lock On Emitter' and added the emitting object (the one the particules were going to be emitted on)
- Replaced Shape 001 by Shape Instance and added the particule shape (in this case all of my stones were a unique object and I checked 'Objects Elements')
- Added some separation in Position Object
- Deleted Speed
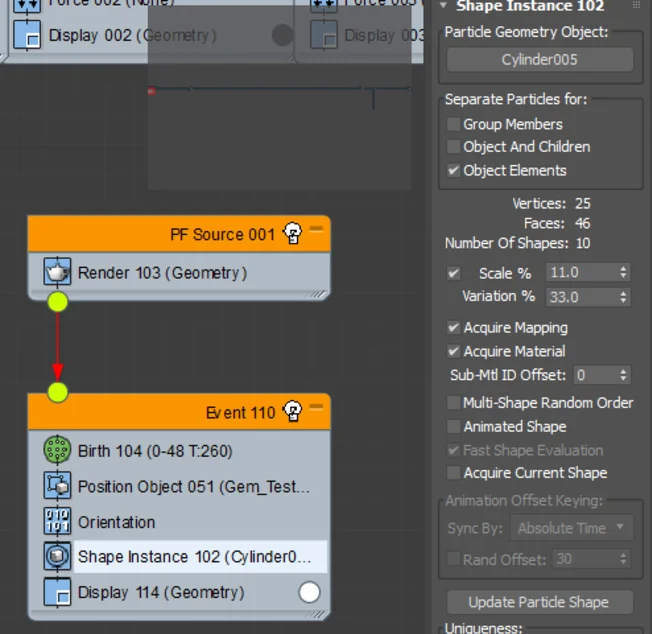

- At this point, I wanted my particules to all face the normal of the central part. So I created a Data Operator that I called 'Orientation' and followed the steps of this great tutorial by Alvaro Moreira and Particle Skull.
- I adjusted birth, size and variation of the particules until I got something that looked accurate

I eventually repeated those steps for big and medium stones and ended up with 3 different particule systems. I also used this to my advantage for shading later on, since it allowed me to apply 3 different colors without having to properly unwrap everything.

3. Baking particules
To bake everything I used PFlow Baker by Ofer Zelichover. You'll find it here. I also created a boolean object to be able to clean the edges later in ZBrush.

4. ZBrush
I decided to keep geometry as it was for medium and big stones (I ran some tests with a low poly mesh and displacement map at some point but I lost sharpness a little bit). But for the small stones I wanted to create a cleaner and closed mesh.

I made it a dynamesh to close holes and apply my boolean object (quick steps for booleans in ZBrush can be found here). I then got details back by dividing and using ProjectAll with the original mesh. I just masked the outer edge to keep it nice and clean.

5. Rendering
To render, I used Maya and Arnold. I also like to work with alSurface shader, which has more functionalities than aiStandard shader (up to Arnold 4 at least). You can download all alShaders here.

The important thing to keep in mind when working with transmissive materials like crystal, is to always set diffuse to 0, specular and transmission to 1, to set the correct IOR, and to enable caustics. From that base, parameters variations are going to be pretty subtle.

I painted 3 different map for transmission colors. I also added a map in transmission and specular roughness to give some texture.

Finally I worked on lighting and tried to pick reflections I liked. Render and TADA !

